

The most effective method to Grow pumpkins and squash
Pumpkins and squash are images of fall, as are flexible vegetables loaded with supplements and flavor. Whether you’re hoping to develop pumpkins for Halloween jack-o-lights or squash to add to generous winter soups, these plants are fulfilling and somewhat simple to develop. In this blog, we’ll cover all that you want to be aware of when developing pumpkins and squash from choosing assortments, setting up the dirt, planting, and really focusing on them, the entire way through to gathering.
Picking the Right Assortments
Before planting, picking the assortment of pumpkins or squash that suits your needs is significant. There are numerous assortments, and each has its own exceptional characteristics:
Pumpkins:
- Jack-O-Lamp Pumpkins: Exemplary pumpkins utilized for cutting, medium-sized with smooth orange skin.
- Pie Pumpkins: Little to medium-sized pumpkins with sweet tissue, ideal for pies and cooking.
- Monster Pumpkins: Developed for contests, these can gauge many pounds!
Winter Squash:
- Butternut squash: known for its smooth surface and sweet, nutty flavor.
- Oak-seed squash: little, ribbed squash that has a somewhat sweet flavor.
- Spaghetti Squash: A remarkable assortment whose tissue isolates into spaghetti-like strands when cooked.
Summer Squash:
- Zucchini: One of the most well-known assortments of summer squash, simple to develop and gather.
- Pattypan Squash: A little, saucer-formed summer squash with a gentle flavor.
Make a point to pick assortments that are appropriate to your environment and planned use. Most pumpkins and winter squash are more qualified for long developing seasons, while some late spring squash assortments can be collected within a couple of months.
Setting up the Dirt
Pumpkins and squash are weighty feeders, meaning they require supplement-rich soil to flourish. Before planting, guarantee your dirt is very much depleted, wealthy in natural matter, and somewhat acidic (with a pH of 6.0 to 6.8).
- Soil Corrections: Add a lot of fertilizer or very much spoiled compost to the establishing site. Assuming that your dirt is compacted or mud-weighted, think about blending in sand or other natural material to further develop waste.
- Raised Beds or Hills: Pumpkins and squash truly do best when established in raised beds or hills, as this further develops soil air circulation and seepage.
Establishing pumpkins and squash
1. Timing
Pumpkins and squash are warm-season crops that are delicate to ice. Sow seeds after the last ice date in your space, when the dirt has warmed to no less than 70°F (21°C). This is regularly pre-summer or late spring.
2. Separating
Pumpkins and squash need a lot of room to spread. Enormous assortments like jack-o-light pumpkins can spread up to 10 feet or more, so give them a lot of space to develop. More modest assortments like pie pumpkins and summer squash need less space.
Pumpkins: Space slopes 4-6 feet separated and pushes 6-8 feet separated.
Squash: Space slopes 3-4 feet separated and pushes 5-6 feet separated.
3. Planting
Sow 3-5 seeds for every slope around 1 inch down. When seedlings arise and grow a couple inches tall, slight them out by leaving the most grounded a few plants for every slope.
Watering and Treating
1. Watering
Pumpkins and squash need reliable dampness all through their developing season. Water profoundly, around 1 inch each week, yet try not to get the leaves wet as this can support illness. Soaker hoses or trickle water systems are great.
2. Preparing
Since pumpkins and squash are weighty feeders, they will profit from occasional treatment. Utilize a decent compost (like 10-10-10) when the plants initially start to plant, then change to phosphorus-weighty manure while blossoming starts to empower natural product improvement.
Supporting Fertilization
Pumpkins and squash are pollinated by honey bees, and an effective organic product set relies upon legitimate fertilization. To energize pollinators, plant honey bee cordial blossoms close by, like sunflowers or marigolds. You can likewise hand-fertilize by moving dust from the male blossoms to the female blossoms utilizing a little brush.
- Recognizing Male and Female Blossoms: Male blossoms show up first on the plant and have long, slim stems. Female blossoms have a little enlarging at the base (the future foods grown from the ground) stems.
Overseeing Vermin and Infections
Sadly, pumpkins and squash are helpless to bugs and illnesses. A few normal issues include:
1. Bugs
- Squash Plant Drill: This irritation tunnels into the plants, causing withering and plant demise. To forestall them, cover the foundation of the plants with a defensive obstruction or utilize drifting column covers.
- Cucumber Creepy crawlies: These bugs feed on the foliage and can spread bacterial wither. Handpick scarabs, use neem oil or apply diatomaceous earth around the plants.
2. Sicknesses
- Fine Mold: A typical contagious illness that appears as white powder on the leaves. Guarantee great air course by separating plants appropriately and watering at the foundation of the plants to keep leaves dry.
- Bacterial Shrink: Cucumber insects spread this infection, which makes plants shrivel and kick the bucket. Overseeing cucumber insects is vital to forestalling this sickness.
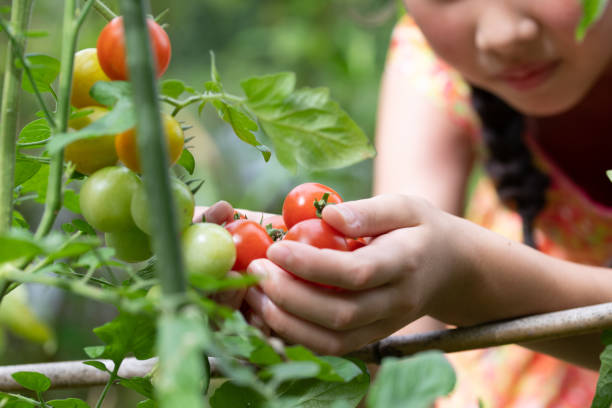
Reaping Pumpkins and Squash
Knowing when to rather guarantees that your pumpkins and squash are delightful and dependable.
1. Pumpkins
Gather pumpkins when they are completely hued and their skins are hard. The stem ought to likewise start to dry and become brown. Cut the pumpkin from the plant, leaving a 3-4 inch stem joined. Handle them delicately to abstain from swelling.
2. Winter Squash
Winter squash ought to be gathered when the skin is hard and opposes scratching with a fingernail. Like pumpkins, cut them from the plant with a part of the stem connected.
3. Summer Squash
Collect summer squash while they are as yet delicate and juvenile. For zucchini, this is commonly when they are 6–8 inches long. Collect habitually to empower more creation.
Putting away pumpkins and winter squash
Once reaped, pumpkins and winter squash ought to be restored in a warm, dry spot for around 10 days to solidify the skin. After relieving, store them in a cool, dry spot (50-55°F) with great air dissemination. Under the right circumstances, they can keep going for a considerable length of time.
Summer squash, then again, ought to be eaten new or put away in the cooler for as long as seven days.
High-level ways to develop pumpkins and squash
Assuming you’re hoping to take your pumpkin and squash development to a higher level, here are a few high-level tips that can assist with expanding your yields, working on the nature of your harvest, and guaranteeing an effective developing season.
1. Preparing Plants for Ideal Development
Pumpkins and squash are famous for their rambling plants, which can overwhelm a nursery whenever left unrestrained. Preparing the plants can assist with overseeing space, decreasing infection hazards, and even lifting natural product creation.
- Squeezing Off the Tips: When the plants arrive at 10-15 feet long, consider squeezing off the developing tips. This urges the plant to zero in its energy on creating natural products as opposed to proceeding to develop. This is particularly valuable for bigger assortments that need an additional chance to foster their natural product.
- Coordinating the Plants: Delicately guide plants toward the path you believe they should develop, particularly if you’re establishing in a little space. You can utilize stakes to hold the plants set up or prepare them to develop along a wall or lattice.
2. Trellising Squash for Space Productivity
For nursery workers with restricted space, vine squash (particularly lighter assortments) can be prepared to develop upward on lattices. This method saves ground space as well as diminishes the risk of vermin pervasions and further develops air dissemination, which forestalls illnesses like fine mold.
- Picking a Solid Help: Guarantee that the lattice or wall is sufficiently able to help the heaviness of the developing squash. Heavier assortments, similar to pumpkins or butternut squash, may require extra help with slings or mesh to support the creation of the natural product.
- Trellising Procedures: As the plants develop, delicately attach them to the help utilizing delicate ties or nursery twine. Make certain to consistently take a look at the plants and change the ties depending on the situation to try not to cut into the plants.
3. Amplifying yields with progressive planting
To guarantee a nonstop stock of summer squash all through the season, think about progressive planting. This technique includes sowing new seeds every 2-3 weeks during the developing season. Since summer squash produces natural products quickly, this procedure can push your gather along the entire summer.
- Stunning Harvests: By establishing in progression, you stay away from an overabundance of squash at the same time and keep your nursery delivering new vegetables for quite a long time. This strategy is especially helpful for assortments like zucchini that mature rapidly.
4. Zeroing in on Natural Product Size for Rivalries
On the off chance that you’re keen on developing goliath pumpkins for rivalries or essentially for its excitement, the following are a couple of key tips to empower the greatest development:
- Particular Pruning: Permit only a couple of pumpkins to bloom on every plant, eliminating any remaining blossoms and little organic products. This will coordinate the plant’s all’s energy into growing a solitary enormous pumpkin.
- Preparing for Development: Utilize high-nitrogen manure during the early development stages to empower plant and leaf improvement. When the natural product starts to create, change to a potassium-rich compost to advance the huge natural product.
- Watering Reliably: Goliath pumpkins require a lot of water to arrive at their maximum capacity. Water profoundly and reliably, guaranteeing that the dirt stays uniformly clammy yet not waterlogged.
5. Further developing soil well-being for greater yields
Solid soil is the establishment for an effective yield. To further develop your dirt quality and increment yields, center around developing natural matter and keeping up with soil fruitfulness.
- Cover Harvests: Establishing cover crops like clover, vetch, or rye in the offseason can assist with further developing soil structure, fixing nitrogen, and smothering weeds. Till the cover crops into the dirt before establishing your pumpkins and crush to advance the dirt.
- Crop Turn: Try not to establish pumpkins and squash in similar areas for many years, as this can drain the dirt of supplements and lead to expanded vermin and sickness issues. Pivot with different yields like beans, peas, or salad greens to break the irritation and infection cycle.
- Mulching: Applying a thick layer of natural mulch, for example, straw or fertilizer, around the foundation of the plants holds soil dampness, stifles weeds, and further develops soil wellbeing as the mulch deteriorates.
6. Shielding Your Harvest from Ice
Pumpkins and squash are ice delicate, and an unexpected frosty spell can harm your plants before they’ve got an opportunity to develop completely. This is the way to shield your yield from right-on-time or late-season ice:
- Line Covers: Utilize drifting column covers to safeguard youthful seedlings from surprising ices in the spring. In the fall, cover mature plants with column covers or canvases on evenings when ice is anticipated.
- Collecting Before Ice: Assuming that ice is unavoidable and your pumpkins or squash are almost ready, consider gathering them ahead of schedule to keep away from ice harm. Marginally underripe winter squash will keep on maturing off the plant, while pumpkins might in any case foster some pleasantness whenever put away in a warm spot after collecting.
7. Relieving for Long-Hour Stockpiling
After collecting pumpkins and winter squash, relieving them is fundamental for long-haul stockpiling. This cycle hardens the skin and permits any little wounds to recuperate, forestalling decay.
- The most effective method to fix: Spot the collected squash in a warm, dry region (around 80-85°F) with great airflow for 10-14 days. After restoring, move them to a cooler region for long-haul stockpiling.
- Ideal Capacity Conditions: Store your pumpkins and squash in a cool, dry, and dull spot, preferably around 50-55°F with 60-70% mugginess. Check them consistently for indications of decay or shape, and eliminate any impacted natural products quickly to forestall deterioration of the whole bunch.
Last Contemplations
Developing pumpkins and squash is a compensating adventure that permits nursery workers to interface with the seasons, appreciate new produce, and celebrate fall with their own local harvests. By following these tips and remaining mindful of your plants’ necessities, you can grow a guard harvest of pumpkins and squash whether for eating, improvement, or, in any event, contending in goliath pumpkin challenges.
With legitimate consideration, arranging, and a little persistence, your nursery can create these lively and flexible vegetables, adding both excellence and food to your home all year. So why not check it out? Cheerful gardening!
Leave a Reply